
HP DeskJet D2466 is a single-function inkjet black & white printer. As the support has ended for this printer, its driver is not available for download on their official website. But don’t worry because you can download its driver from the below given download section. You can download this driver for Windows 11, 10, 8, 8.1, 7, Vista, XP (32bit / 64bit), Server 2000 to 2022, Linux, Ubuntu, and Mac 10.x, 11.x, 12.x, 13.x, 14.x, 15.x. After downloading the drivers, also check out the “how to install” section as well which is also given just beneath the download section. So without wasting time, let’s start the installation process by downloading the drivers first.
Advertisement
Download HP DeskJet D2466 Driver
To download the driver, click on the download button below according to your version of your operating system.
| Driver File Details | Download Links |
| Full feature driver for Windows XP / Vista | Full Feature Driver / Basic Driver |
| Full feature driver for Windows 7 | Download |
| Full feature driver for Windows 8, 8.1, 10, 11 | Download |
| Basic driver for Windows All Editions | Download |
| Full feature driver for MAC | Download |
| Full feature driver for Linux | Download |
| OR | |
| Download HP Deskjet 2466 driver from its official page | Go to HP’s official website |
How to Install HP DeskJet D2466 Printer Driver Using Full Feature Drivers
After downloading the driver, you must know the right way to install this printer on your computer. So I have prepared a step-by-step guide to install this printer driver.
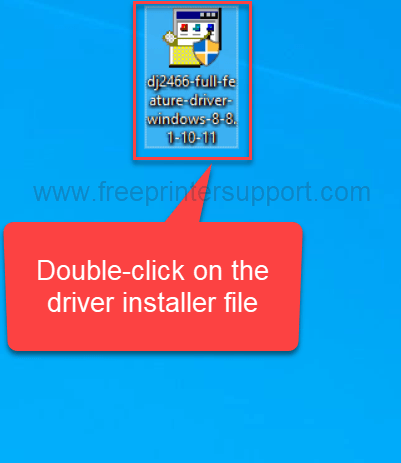
Step 1: Download the driver from the above given download section and then double-click on the downloaded file.
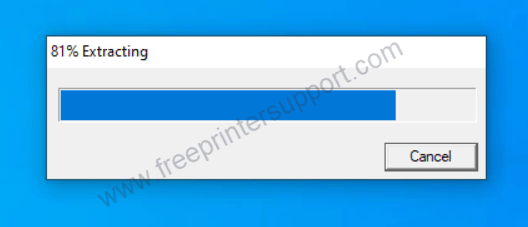
Step 2: Exrtrcating the file, please wait until it’s done.
Step 3: An installation wizard will show up, click on the install button there.

Step 4: Click on the Next button.

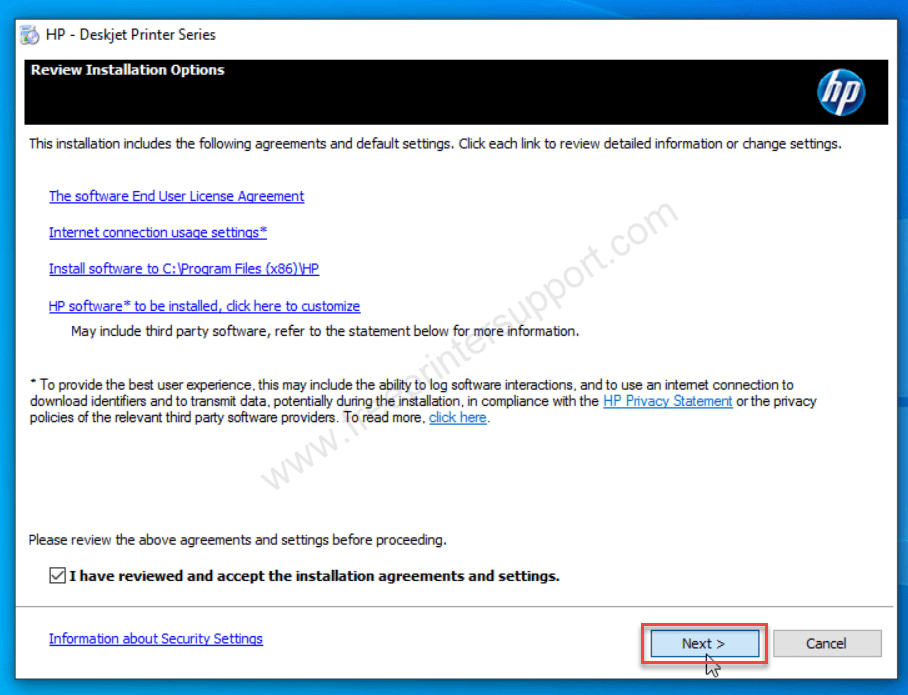
Step 5: Check the agreement box and then click on Next.
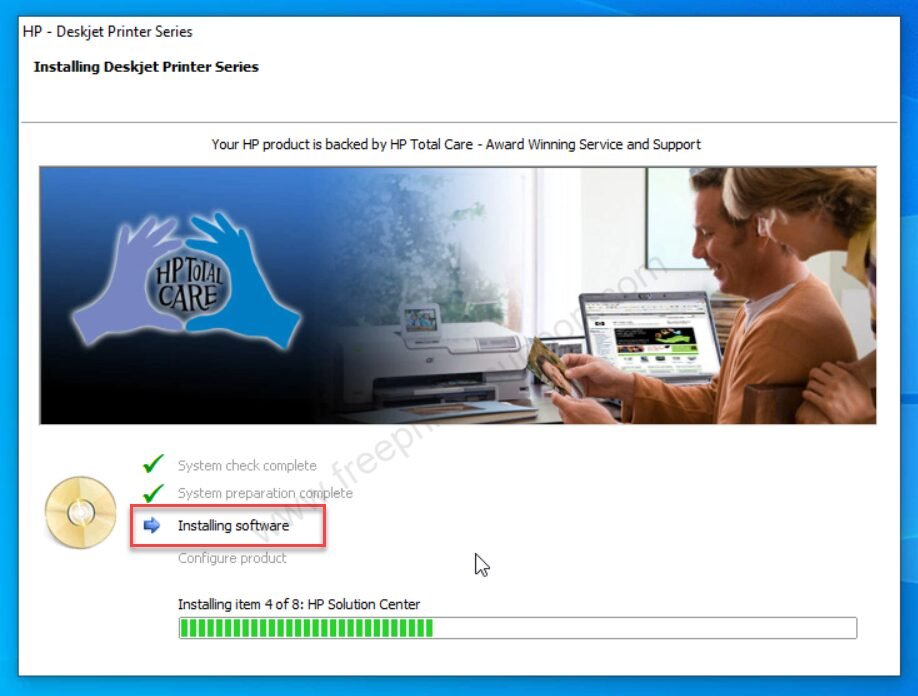
Step 6: Install the software & driver, so please wait.
Step 7: Now, connect the printer’s USB cable to the computer and make sure the printer is turned ON. After connected, this screen will auto-detect your printer and will activate the next button, click on the next button.
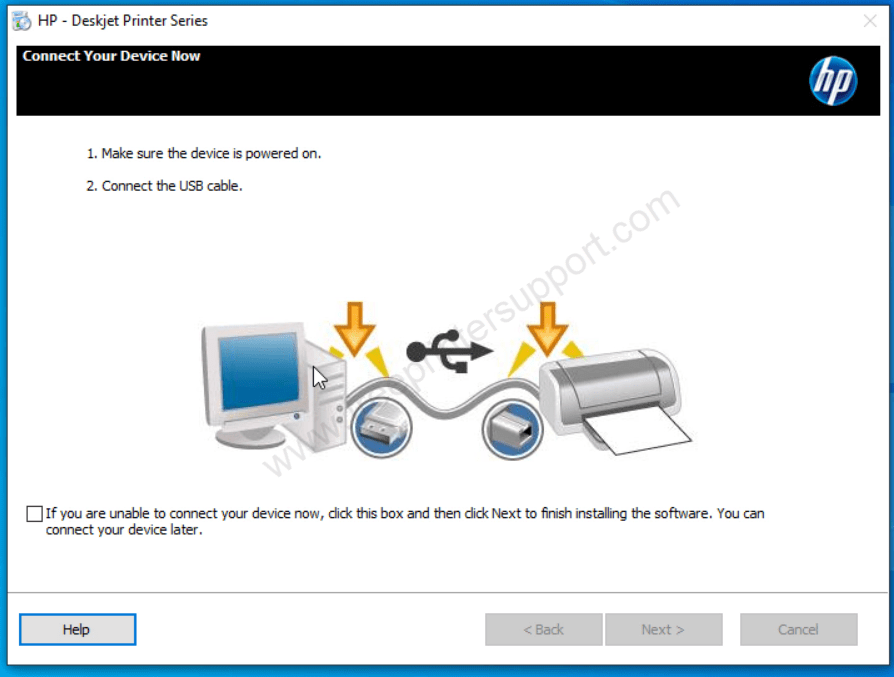
Step 8: After that, all the steps are done. Please wait for let it done.
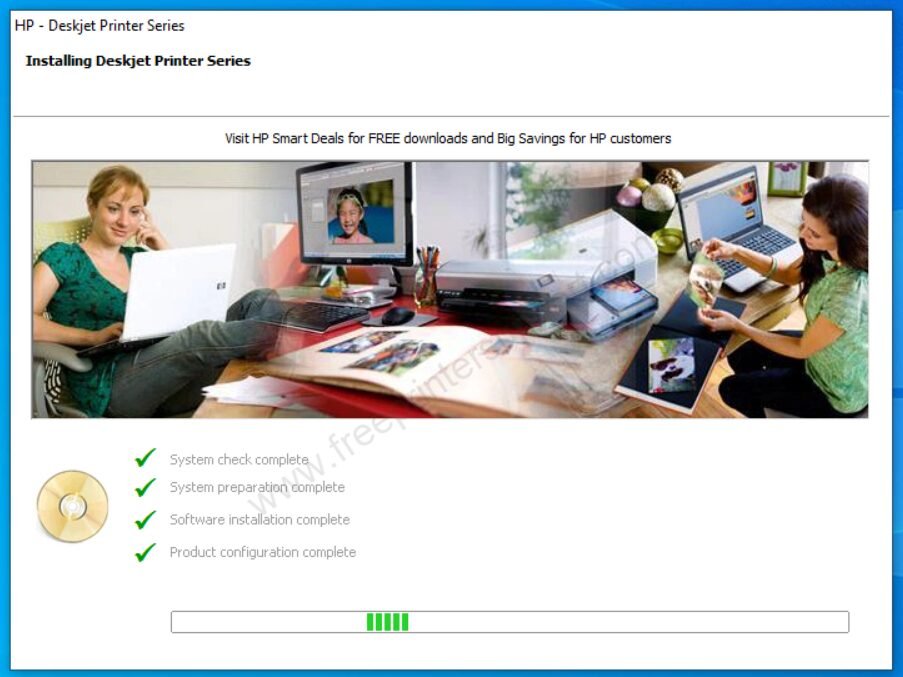
Step 9: Now click on the option “Place a shortcut” and then click on Finish.
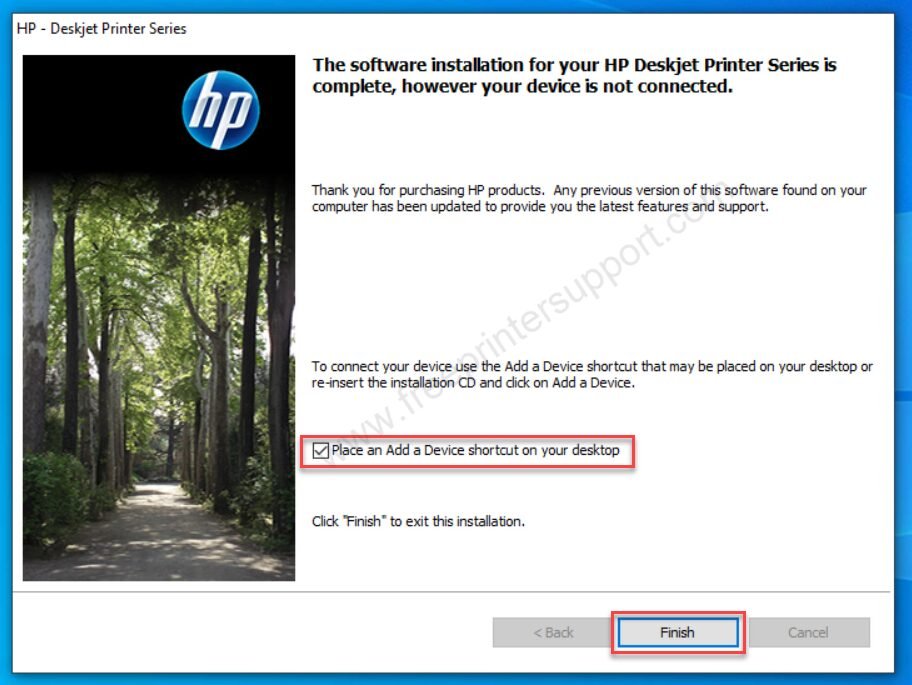
Step 10: As you can see the HP deskjet d2466 printer and its software has been installed successfully.
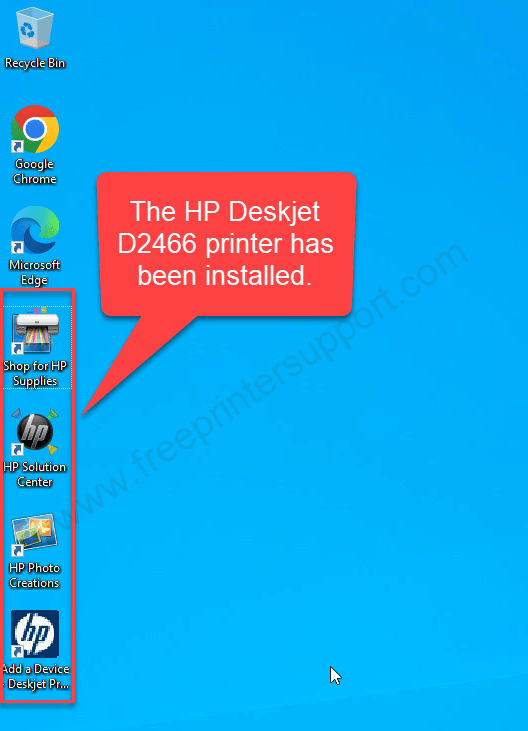
That’s it. Hope you will install this HP deskjet d2466 printer on your computer by following the above steps.
Alternatively, if the above given full feature driver doesn’t work for you or giving you any error message then there is another method (Basic Installation) to install this printer by using its manual settings. Let’s see how to do it.
How to Install HP DeskJet D2466 Printer Using Basic INF Drivers
To install this printer manually using the basic driver, follow the following steps.
Step 1: Download the basic driver from the above given download section. Or click here to download the basic drivers.
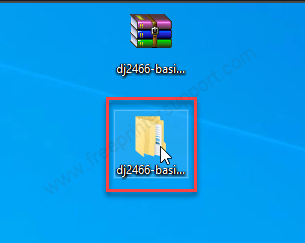
Step 2: Unzip the downloaded driver file. It will create a folder in the same location which contains the driver files.

Step 3: To start installing, click on the start button and then click on settings and then click on devices.
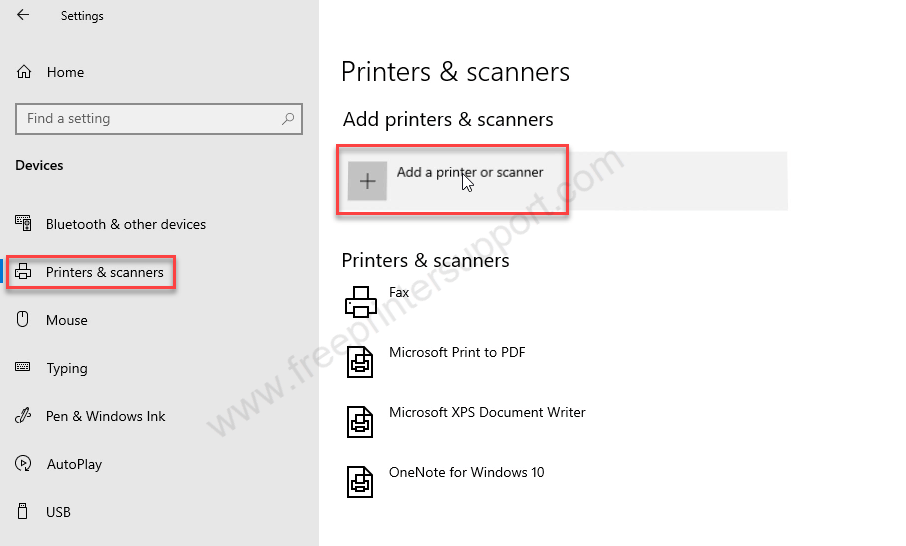
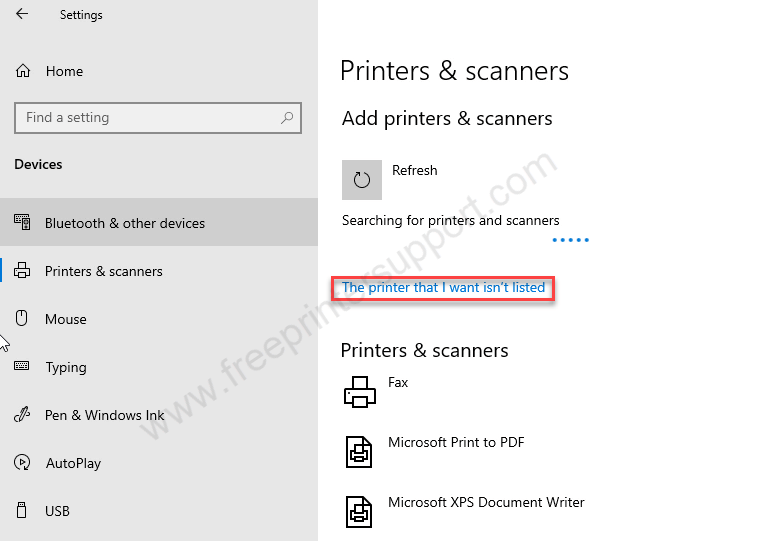
Step 4: On the devices page, click on “printer & scanner” from the left side pane and then click on the plus icon of “Add a printer or scanner” and after that click on the link: “The printer that I want is not listed here”. After you click on that, it will open up an installation wizard.
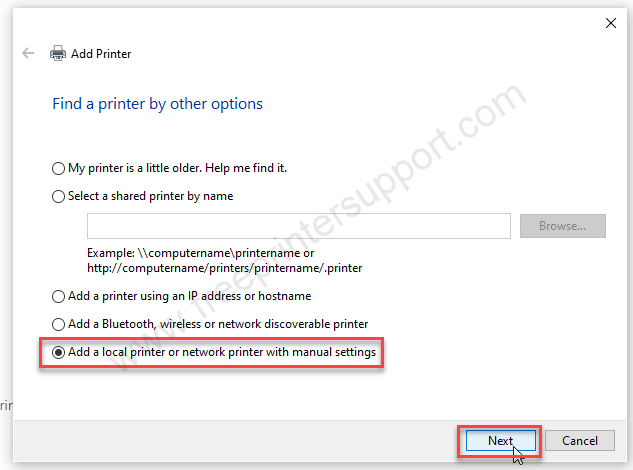
Step 5: In the installation wizard, choose the last option: “add a local or network printer with the manual settings” and then click on OK.
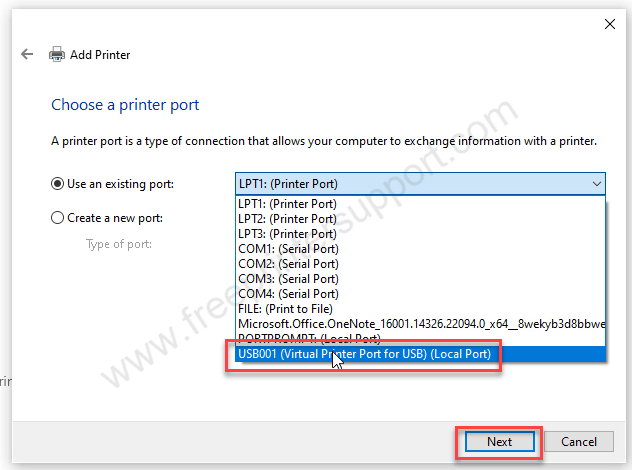
Step 6: After that, it will ask you to choose the port. Click on the drop down menu for ports and then choose USB001 , 002 or 003 and then click on Next.
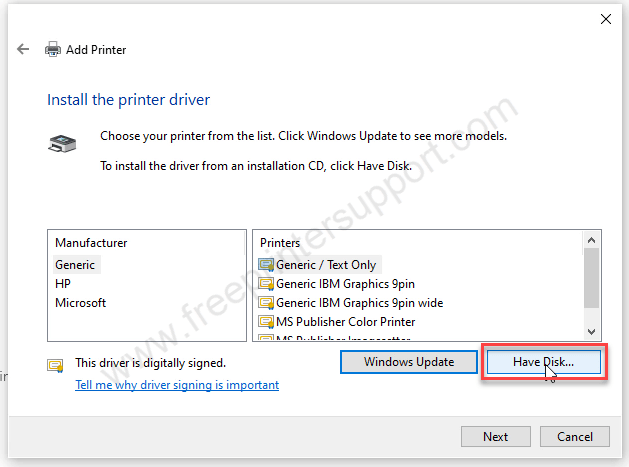
Step 7: Now, it will ask for an INF driver for installation. Click on “Have Disk” and then click on the browse button and then go to the location where we have unzipped the basic driver file. Open the 64bit folder and then select the file “prnhp003.inf” and then click on Open and then click on OK.

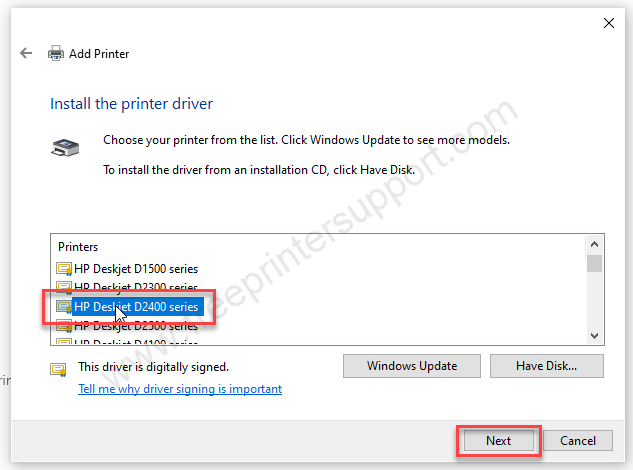
Step 8: Some drivers will be listed on the screen, select the model number “HP Deskjet D2400 Series” and then click on Next. Don’t confuse between D2400 Series and D2466 model number beause both the printers use the same (main series) drivers. This is an official statement by HP.
Step 9: It is now installing the drivers, so please wait.
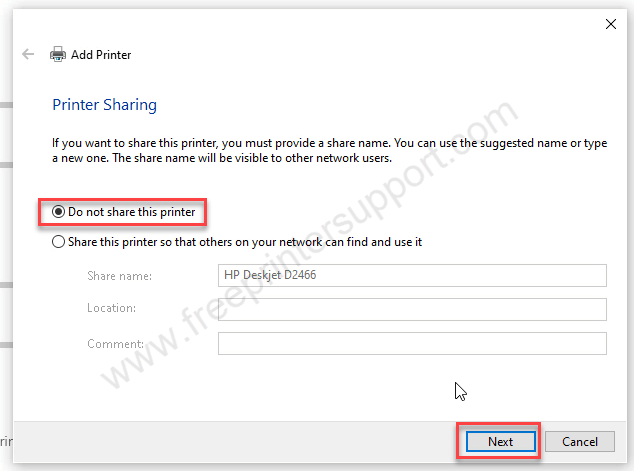
Step 10: Now choose the first option: “Do not share printer” and then click on Next.
Step 11: Finally the printer has been installed successfully. Click on Finish to continue.
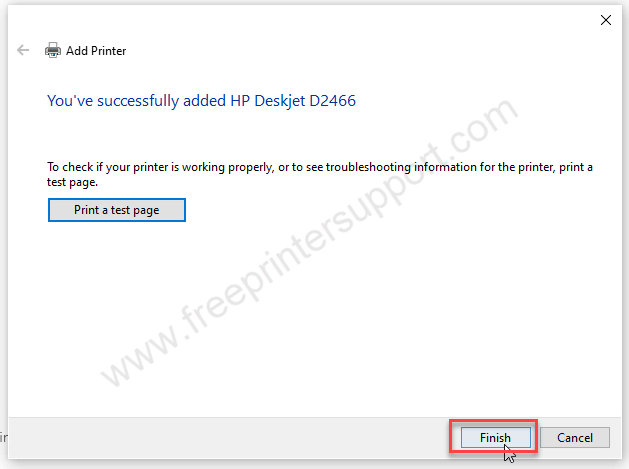
After applied all the above steps properly, your printer will be installed successfully. As you can see in the next screenshot, the HP deskjet d2466 printer has been installed successfully.
I hope this tutorial will help you to install HP Deskjet D2466 printer on your computer without any hassle.

