Printer problem have been a source of frustration for Windows users from a long time. One such printer problem is when the printer prints only half of the paper and then stops abruptly. This problem can happen due to multiple reasons. In this guide, we will look at various solutions which can help you fix the printer which prints only half of the paper and then stops.
How to fix printer prints only half of the paper in simple steps?
Before trying advanced and lengthy solutions for this problem you should try some simple solutions. Maybe your printer is having this trouble due to some basic negligence, which can be resolved by taking some precautions.
Advertisement
- CPU Overload: If you are running multiple applications of your computer while the printer is printing, then most probably your computer is too busy to send print information regularly and your printer stopped printing the document abruptly. In such a scenario, you should wait for the print job to complete before working on any other application. This is especially important if your print job has a lot of pages or is graphics intensive, which means it would require your computer’s resources.
- Change Application: Try to send print command from another application. For example, if you are trying to print an MS Word document, then try printing something through Notepad. If the Notepad document prints properly, then the problem is with your original application and not with your printer or printer settings.
- Check Printer Cable: Make sure that your printer is properly connected to your computer and its power outlet. Also, check the ink/toner levels of your printer cartridges. Sometimes, printing stops in midway because of loose cable connections or insufficient ink/toner levels.
If none of the above suggestions helped you and your printer is still printing incomplete documents, then you will have to try the solutions explained below.
Fix: Printer prints only half of the paper and then stops. How to fix it?
When your printer is unable to print documents completely, then follow the solutions given below in the order they have been mentioned.
Solution 1: Check Printer Configuration
Maybe the page settings of your printer have been altered by some application and changed it to a smaller sized paper. You can check and rectify these settings by following the steps given below.
- Type ‘control’ on your Taskbar search and select ‘Control panel’ from the search results.

- In the Control Panel, make sure to view the icons as ‘Small icons’, then click on the ‘Devices and Printers’ option.

- Right click your printer and choose ‘Printer preferences’ from the menu options.

- In the Printer preferences window, click on the ‘Paper’ tab and make sure the ‘Paper Options’ are set according to your requirements. If you want you can change the settings to your requirement, then click on the ‘OK’ button.

Try to print your desired document with your printer and if the problem still exists, then continue to the next solution.
Solution 2: Restart Print Spooler & Clear Print Queue
Sometimes, the print spooler service on your computer starts malfunctioning and your printer is unable to get complete document for printing. To solve this problem you must restart the print spooler service and also clear the existing print queue of your problematic printer.
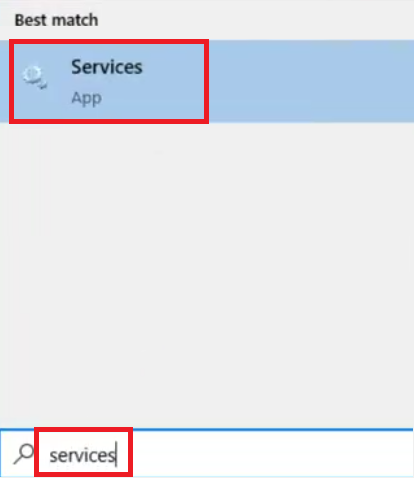
- In the Taskbar search box, type ‘services’ and select ‘Services’ from the search results.

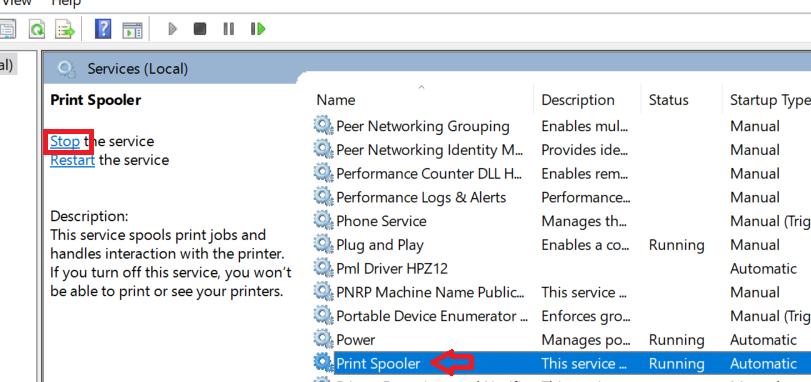
- In the Services window, locate and select ‘Print Spooler’ option and click on ‘Stop’ link to stop the spooler service.

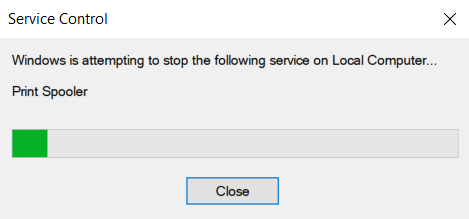
- Wait for the print spooler service to stop.

- Now, right click the ‘Start’ button and choose ‘Settings’ from the menu.

- In the Settings page, click on the ‘Devices’ option.

- In the Devices page, choose ‘Printers & scanners’ option. Under Printers & scanners, locate and click your printer, then select ‘Open queue’ button to open the print queue.

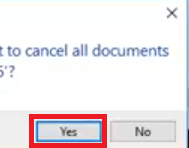
- In the Print queue window, right click on the open space and select ‘Cancel All Documents’ option.

- Click on the ‘Yes’ button to confirm the cancellation of the print queue documents, then ‘Close‘ the Print queue window.

- Go back to the Services window, make sure that ‘Print Spooler’ is selected, then click on the ‘Start’ link.

- Wait for the print spooler service to start again.

- Close the Services window.

That’s it, you have restarted the print spooler service and cleared your printer’s print queue. Restart your computer and try to print your document one more time. If your printer is still printing half pages, then you must try the final solution given below.
Solution 3: Remove & Reinstall your Printer
If none of the above solutions worked for you, then you must follow the final solution of removing and reinstalling your printer. This solution can solve many printer related problems on your computer. Please, follow the steps carefully.
- Right click the ‘Start’ button on the Taskbar and choose ‘Settings’ from the menu.

- In the Settings page, click on the ‘Devices’ option.

- In the Devices page, select ‘Printers & scanners’ option. Under Printers & scanners section, find and select your printer, then click on the ‘Remove device’ button to remove your printer.

- Click on the ‘Yes’ button to confirm the removal of your printer.

- Once the printer is removed, click on the ‘Plus’ sign on the front of ‘Add a printer or scanner’ option.

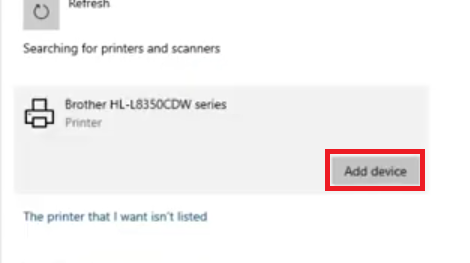
- Windows will automatically find your printer, click on the printer name to continue.

- Click on the ‘Add device’ button to add the printer.

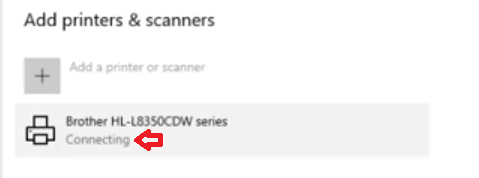
- Wait for the Windows to connect with your printer.

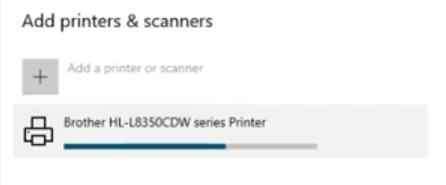
- Wait for the Windows to install your printer driver.

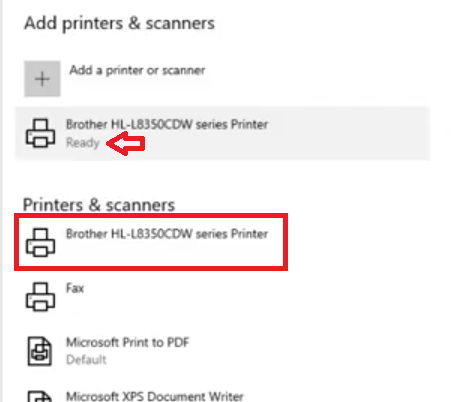
- When you see your printer is ready, it means you can start printing.

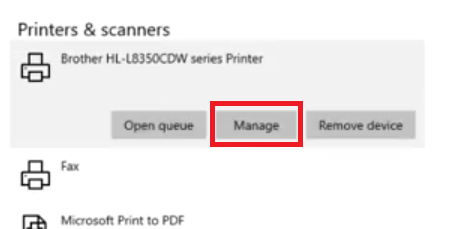
- Select the printer from the list and click on the ‘Manage’ button.

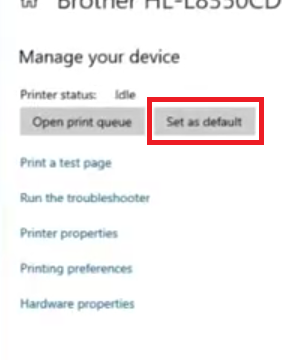
- In the Manage options, click on the ‘Set as default’ button to proceed.

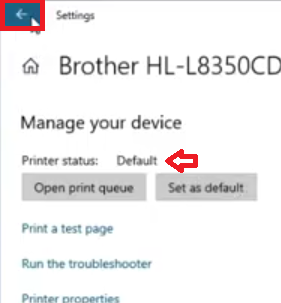
- Once the printer is set to default, you should click on the ‘back arrow’ to go back to the Printers & scanners page.

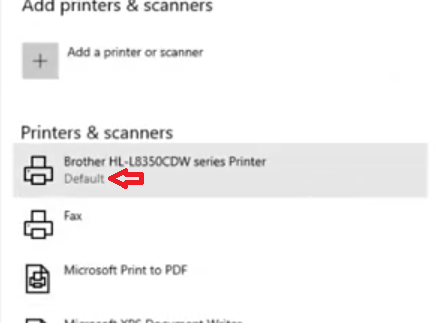
- Now, you can see that your printer is set as the default printer.

That’s it, you have removed and successfully reinstalled your printer on your computer. If you try to print your documents, then they should print properly and completely.
When your printer prints only half of the paper and then stops printing, you can easily fix your problems by following the above mentioned solutions.


